JBoss Application Server for Linux
Installation of WildFly 8 in Linux
Before moving ahead with
Installation make sure that you have Java EE 7 installed on your system. WildFly 8
will not work with previous revisions. Please follow the below guide to install
Java EE 7 in the Linux systems.
Step 1: Downloading WildFly 8
Use the following link to
download the latest WildFly zip file.
You may also use ‘wget‘ command
to download directly on the command line.
[root@tecmint]# wget http://download.jboss.org/wildfly/8.0.0.Final/wildfly-8.0.0.Final.zip
Copy zip file to any preferred
location (e.g. ‘/data/‘ in my case) and extract using ‘unzip’ command.
[root@tecmint]# cp wildfly-8.0.0.Final.zip /data/
[root@tecmint]# cd /data/
[root@tecmint data]# unzip wildfly-8.0.0.Final.zip
Step 2: Setting Environment Variables
Now set some environment
variables. You can set these on system wise or within your configuration files.
Here I am setting within configuration files standalone.sh andstandalone.conf in ‘bin‘ folder.
[root@tecmint data]# cd wildfly-8.0.0.Final
[root@tecmint data]# cd bin/
Add these two following lines to standlone.sh/standlone.conf files. Please specify your WildFly
installation location and Java Home location.
JBOSS_HOME=”/data/wildfly-8.0.0.Final”
JAVA_HOME=”/data/java/jre7/bin/java”
Note: For whole system wide, you can set it under ‘/etc/profile‘
file.
Step 3: Starting WildFly 8
Now start server i.e. for
standalone mode use ‘standalone.sh‘ and for domain mode use ‘domain.sh‘.
[root@tecmint bin]# ./standalone.sh
[root@tecmint bin]# ./domain.sh
But, here I am starting in
standalone mode. By default it will get start by ‘standalone.xml‘
file, But You can also start with some other configuration using ‘–server-config‘
option.
As below I am starting server
with ‘standalone-full-ha.xml‘
and this file is present in “$JBOSS_HOME/standalone(profile)/configuration/”.
[root@tecmint bin]# ./standalone.sh --server-config standalone-full-ha.xml
Sample Output
Calling "/data/wildfly-8.0.0.Final/standalone/configuration/standalone.conf"
Setting JAVA property to "/data/java/jre7/bin/java"
===============================================================================
JBoss Bootstrap Environment
JBOSS_HOME: "/data/wildfly-8.0.0.Final"
JAVA: "/data/java/jre7/bin/java"
JAVA_OPTS: "-client -Dprogram.name=standalone.sh -Xms64M -Xmx512M -XX:MaxPerm
Size=256M -Djava.net.preferIPv4Stack=true -Djboss.modules.system.pkgs=org.jboss.byteman"
===============================================================================
13:55:26,403 INFO [org.jboss.modules] (main) JBoss Modules version 1.3.0.Final
13:55:33,812 INFO [org.jboss.msc] (main) JBoss MSC version 1.2.0.Final
13:55:35,481 INFO [org.jboss.as] (MSC service thread 1-1) JBAS015899: WildFly 8.0.0.Final "WildFly" starting
13:55:58,646 INFO [org.jboss.as.server] (Controller Boot Thread) JBAS015888: Creating http management service using socket-binding (management-http)
...........
13:56:22,778 INFO [org.jboss.as] (Controller Boot Thread) JBAS015961: Http management interface listening on http://127.0.0.1:9990/management
13:56:22,794 INFO [org.jboss.as] (Controller Boot Thread) JBAS015951: Admin console listening on http://127.0.0.1:9990
13:56:22,794 INFO [org.jboss.as] (Controller Boot Thread) JBAS015874: WildFly 8.0.0.Final "WildFly" started in 64534ms - Started 229 of 356 services (172 services are lazy, passive or on-demand)
Step 4: Acessing WildFly 8
Now you can point your browser to
‘http://localhost:8080‘
(if using the default configured http port) which brings you to the Welcome
Screen.
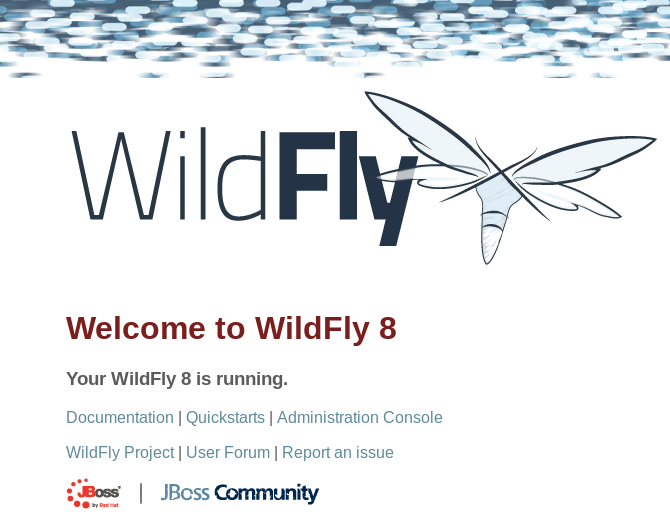
Wildfly Welcome Screen
From here, you can access WildFly
community documentation guides and enhanced web-based Administration Console
access.
Step 5: Managing WildFly 8
WildFly 8 provides two
administrative consoles for managing running instance:
A. web-based
Administration Console
B. command-line
interface
Before connecting to
administration console or remotely using the command line, you will need to create
a new user using the ‘add-user.sh‘ script in the bin folder.
Next, go to ‘bin‘ directory,
set ‘JBOSS_HOME‘
in add-user.sh (if variable is not set on system
bases) and create user as below.
[root@tecmint bin]# ./add-user.sh
Once starting the script you will
be guided through the process to add a new user:
Sample Output
What type of user do you wish to add?
a) Management User (mgmt-users.properties)
b) Application User (application-users.properties)
(a):
Enter the details of the new user to add.
Using realm 'ManagementRealm' as discovered from the existing property files.
Username : admin
The username 'admin' is easy to guess
Are you sure you want to add user 'admin' yes/no? yes
Password recommendations are listed below. To modify these restrictions edit the add-user.properties configuration file.
- The password should not be one of the following restricted values {root, admin, administrator}
- The password should contain at least 8 characters, 1 alphanumeric character(s), 1 digit(s), 1 non-alphanumeric symbol(s)
- The password should be different from the username
Password :
Re-enter Password :
What groups do you want this user to belong to? (Please enter a comma separated list, or leave blank for none)[ ]:
About to add user 'admin' for realm 'ManagementRealm'
Is this correct yes/no? yes
Added user 'admin' to file '/data/wildfly-8.0.0.Final/standalone/configuration/mgmt-users.properties'
Added user 'admin' to file /data/wildfly-8.0.0.Final/domain/configuration/mgmt-users.properties'
Added user 'admin' with groups to file /data/wildfly-8.0.0.Final/standalone/configuration/mgmt-groups.properties'
Added user 'admin' with groups to file /data/wildfly-8.0.0.Final/domain/configuration/mgmt-groups.properties'
Is this new user going to be used for one AS process to connect to another AS process?
e.g. for a slave host controller connecting to the master or for a Remoting connection for server to server EJB calls.
yes/no? yes
To represent the user add the following to the server-identities definition
Press any key to continue . . .
Now access the web-based
Administration Console at ‘http://localhost:9990/console‘
and enter the new created username and password to directly access the
Management Console.

WildFly Login
First Screen After login.
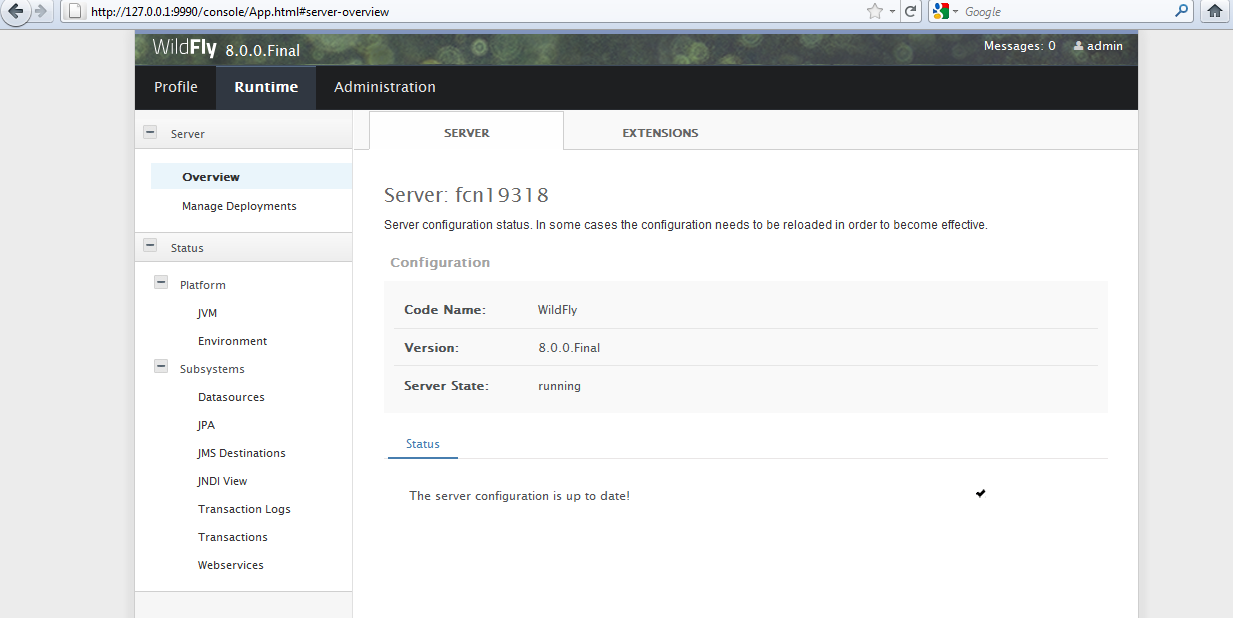
WildFly Web Panel
If you prefer to handle your
server from the CLI, run the ‘jboss-cli.sh‘
script from the ‘bin‘ directory that offers the same capabilities
available via the web-based UI.
[root@tecmint bin]# cd bin
[root@tecmint bin]# ./jboss-cli.sh --connect
Connected to standalone controller at localhost:9999
No comments:
Post a Comment